Thursday, June 30, 2011

More Wallpapers :)

Well one and all I have some more wallpapers for everyone :)

One is using the fab work of Keith Garvey another is Myka  a third is Ismael Rac and fourth by Melissa Dawn :)

Enjoy :D

All sizes are as follows 1024x647 and 1280x800


Tuesday, May 17, 2011

Yummy Icecream Dream


This tut was writen by me , Nicky aka Lady White Wolf
This tut was writen on May 17th, 2011 with a working knowledge of Paintshop pro.

Supply Needed:
Tube of your choice, I am using the work of Keith Garvey who you can purchace HERE
Font Icecream Soda which u can find HERE
Scrap of your choice I am using Icecream Dream by Rieka and u can get it HERE
Paint Shop Pro (any version will do I am using 9)

Now lets get started :)

Open up your tube and the scrap kit

Open new image 600x500 transparent

Open paper8 and copy it.  go to your  new image and selection select all and then edit paste into selecton and selection selet none

Now go over to your tube and copy it then paste as new layer on ur new image.
Resize 90% and move it were u like.

Open and copy Flower 2 and resize it 20% and then again at 50% and paste twice and move to cover the exposed breats of the tube.  Merdge them down to the girl so they are one. 
Add drop shadow 5,5,50,5.00 color black

Open and copy word art 5 (Yummy) and paste into new image and move down to under the tube.
Resize 80% and position how u want.

Open and copy Ribbon 1 and move it how u like also under the girl though :)

next take the ice creams ( 7, 4 and 2) and copy them and paste them into your new image,
Resize them how u like. 

Add your copyright information and Name and save as JPG and your done :)

Thank you so much for looking and trying :)


Sunday, April 10, 2011

My First Award WOOHOO

I just got my first award from my friend Nae TY so much hun :)

The aim of the award is to bring recognition to blogs with minimal followers.


Since I have accepted the award I must pass it on to at least 3 other blogs (but not more than 5),

that have inspired me and I feel deserve a bit more attention.

I am passing this on to some awesome designers and also some peeps I am proud to call my Friends.♥


The rules are to say thank you on my blog to the one who passed it on to me

and link to their blog . Pick the blogs to pass the award on to,

leave a note on their blog and then list them with links to their blogs...

I chose these four blogs because these ladies are awesomely talented, original and inspiring:

saucysandy aka Sandy
 
Mazzzy Starrr aka Mazzy
 
Jenny's Designz aka Jenny


Sunday, February 27, 2011

Happy St. Patricks Day Forum Set tut


This tut was writin on Feburay 27th,2010 by Nicky (me)
SUPPLY:
Eye Candy 4 Gardent Glow
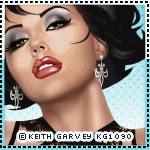
Tube of choice, I am using the art of Ismael Rac who is Pay To Use u can get his work HERE
Font of choice, I am using Patty Day
PSP (any version I am using psp 9)
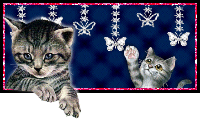
St. Patty Day Scrap Kit by Donna's Desginz which is Pay To Use , Can be found HERE
Ok lets get started :)

Open your PSP and get your tube, font and have ur scrap kit ready :)


SIG:
Open new image 700x330 transparent
Open DD Paper 05 and copy
Back to your new image and go to selection selet all and edit paste into selection seletion select none.
next lets open Clover Coin Frame 01 and resize it 80% and copy and paste as new layer into our new tag .
Open the tube and if your using the same as me then click the closeup and copy it.
Take your magic wand and click inside your frame and paste as new layer your closeup tube now use your Move tool  and resize your closeup to the size u want and move her so shes centered inside the frame like I have.
After you have it just right go to selections invert and hit delet on your keyboard. Move the closeup below your frame. Make your frame ur active layer and go to layers merdge merdge down. Resize merdged 80% and move to the right.

Open ur tube and click the main one and copy it. 

Paste as new layer in your new tag. 

Resize 80% and move toward the left.

Next open Ballon 01 and resize 40% and Copy it and paste into your tag as a new layer and move to the left of your tube so its behind her.

Add your copyright information and text

when u have the text (Name) where u want it right click on it in your layers pallet and convert to raster layer.

Now we are going to use our Gardent Glow.

Use the following Settings:
Color Yellow
9.02
25
68

Save as JPG and your done with that part :)


AVATAR:
Now on to the avatar.
Open new image 100x100 transparent.
Now using the same paper as before we copy it and on the new tag we will go to selection select all and paste your paper into selection and then selectins select None.
Now open Balloon 02 and resize 50% and copy.
Paste as new layer inside your avatar.
Center.
add Name and make raster layer like before
Add Gardent Glow with the same settings as before
Save as JPG and your done.


Thank you so much for looking :)


Saturday, January 29, 2011

R.I.P Andy

Rudolph Anderson "Andy" Mayberry


 MAYBERRY, Rudolph "Andy" Anderson, 28, departed this life Saturday, January 22, 2011. Andy is survived by his parents, Kimberley and Ray Mayberry Sr. of Chester; his brothers, Ray Jr. (Stephanie) and Brad of Chester; his maternal grandfather, Rudolph Williamson Sr.; two nephews, Noah and Caleb; two nieces, Bailey and Kendall, all of whom he adored; uncle, Rudolph Williamson Jr. (Tammy); aunt, Rochelle Smith (Larry); uncle, Ronnie Mayberry (Pam); and 21 cousins who will miss him dearly. We will all miss Andy's passion for equality. The family will receive friends on Thursday, January 27, 2011, from 6 to 8 p.m. at the Chesterfield Chapel of J.T. Morriss & Son Funeral Home. A celebration of Andy's life will follow at 11 a.m. on Friday at the House of Prayer, 10500 Newby's Bridge Rd., Chesterfield, Va. 23832.
In lieu of flowers, please make donations to the Rosmy Group. 2311 Westwood Ave., Richmond, Va. 23230-4011, or http://www.rosmy.org/.
Condolences to the family may be registered at http://www.jtmorriss.com/.


Thursday, January 27, 2011

Valentines Day Word Art

With Valentines day fast approching I thought it would be cool to make some word art so here it is :)

I hope you all enjoy it :)

and always remeber leave some love ;)


You can downloade HERE


Monday, January 10, 2011

Black-n-White


This tut was writen by me (Nicky) on Jan 10th 2011.
Writen with working knowledge of PSP.

Supply Needed :
PSP any version ( I am using version 9)
Tube of choice , I am using the wonderful work of Keith Garvey which u can find HERE
Font of choice , I am using Albemarle Swash
Scrap kit Black and White By Donnas Designzs HERE
Drop Shadow

Ok lets get started shall we :)

Lets open up our supply (tube and have kit ready)
Open a new image 500x500 transparent
Go to Selection select all 
open and copy Paper 25 from the kit and paste INTO selection
Go to Selection and Select None

Now open frame 2 and resize it by 50% and move to the top right of the tag.
Take your magic wand and click inside your frame.
Open up your tube of choice and copy it and paste as new layer.
Resize to your liking so her face only shows in your frame use your move tool to move her around.
When postioned just right go to Selections Invert Selection and hit DELET on your keyboard and Selection and Select None. 
Move this layer BELOW your frame.

Now will add drop shadow to frame and the face using the following settings


Vertical 3
Horizontal -3
Opacity 50
Blur 5.00
color black

Now back to the tube copy it and paste it as new layer and resize 90% and go to Image and Mirror and move to the left side and add the same drop shadow as above.

Now hightligh your frame and open up Bow with Diamonds White from your scrap kit and copy it and paste as new layer and resize 50% and possition it at the bottom of the frame and add the same drop shadow.

Open Mini Black Bow and copy it and paste as new layer and possition it on top of the white bow.
Open and copy the Mini White Bow and past as new layer resize 80% and possition ontop of the black bow.
Merdge down. Add Drop Shadow.

Add your copyright and dropshadown it .

Add your name and drop shadown with the same settings as threwout this tut and save as JPG.

Your done :)

I hope you all enjoyed and thank you so much for looking I can't wait to see what you do with this tut :)


Friday, January 7, 2011

Angel


This tut was writen with the working knowledge of Paint Shop Pro.

Suplies Needed:
Psp (I am using 9)
Drop Shadow
Artmans Scrap Kit Winter Angles
Font A&S Snaper Scripts
Tube of your choice ( I am using the wonderful work of Elias Chatzoudis which u can purchance HERE)
Cloud formation which is supplied HERE

Lets Get Started :)

Open up your suplly first
Make a new image 500x500 Transparent
Layers Select All
open and copy Paper 10
layers paste INTO selection
select None.

Open your cloud formation and copy it and paste as new layer
Resize 90%

Copy your tube and paste as new layer resize 90%

Copy cloud formation again and paste as new layer
Resize 80% place to cover the breasts of the tube if your using the same as I am.

Open and copy Embell 32 and past as new layer and place under all the clouds

Open embell 03 take your magic wand and click inside the frame
Take the close up of the tube and copy it and paste as new layer
resize to your liking and go to selection
Invert and hit delet Select none.
Move the close up to below the frame
Merge all and Mirror.
Copy and paste as new layer resize 60% and move to upper right hand corner.

Now with your mover tool select your first cloude layer so its active. 
Right click on it on it in your layers section to the right and select Duplicate.
Move just behind tube so its like she is laying on the clouds.

Now select your tube layer and apply the drop shadow using the following settings
Vertical 3
Horizontal -3
Opacity 50
Blur 5
Color Black

Now add your copyright information
Add your Name and right click on the layer and convert to raster layer and use the same drop shadow settings as before to it.

Save as JPG and your done :)

Thanks for looking and I hope u had fun