
A Lavender Moment

This tut is writen with a working knowledge of Paint Shop Pro (PSP).
I got to work with the wonderful work of MellieBeans.
The kit is called Lavender Moments.
you can see preview below and click on it to go to her store.

Supplys you need are: This Kit
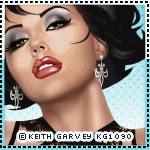
Tube of your choice (I am using the pay to use work of Barbra Jensen which you need a license to use and get one when u make a purchase at her site HERE.)
Font of your choice ( I used the font called Alex Brush which u can find HERE.)
Ok lets get started :)
Open your font, psp, tube, and scrap kit.
Open new image by going to file New Image.
600x550 72.000 pixles, Raster backgroud, Transparent.
Open Paper PP10 and copy it by going to edit copy. Go over to your new image and go to seletion select all then edit paste paste into seletion. Go over to selection select none.
Open element e22 and copy it by going to edit and copy. Move to your new image and go to edit paste as new layer. click your move tool and move it to the right. Go to Layers and Duplicate, then Image Mirror. Move a little on the left to make sure it looks good :)
Open element e09 copy and paste as new layer. Move to the left and up a bit.
Open element e13 and copy and paste as new layer. Move to the bottom.
Open up element 10 and copy and paste as new layer. Move over to the right.
Open element e05 copy and paste as new layer in your new image. Resize by going to Image and Resize 60% and click ok. Move to the right a bit off center.
Open Element e23 and copy. Paste as new layer and resize 55% and move over top of element e05.
Open element e37 and copy and paste as new layer. Resize 20% and mirror it by going to Image Mirror and move to the bottom right.
Open element e08 and copy and paste as new layer. Resize 28% and move to the bottom left corner.
Open up your tube (if its same as mine select the layers u want to go with this kit and hid the others and merge the visible layers by selecting one of the visible layers and right click on it and go to merge viable.) Copy and paste as new layer. Resize 80% and move to the right a bit.
Add your copyright and your name and save :)
Thank you for looking I hope u try this and show me your results :)


No comments:
Post a Comment